Earlier this week I posted about two Kindle covers I made for my sister. I had a few requests for a tutorial for the second one so here it is... I made the pattern and tweaked everything as I went so let me know if you have any questions!
The materials:

Green outdoor fabric
Brown pattern fabric
Thin silver elastic
Thin black elastic
Blue bias tape
Coordinating button
- Start by cutting out all the pieces.
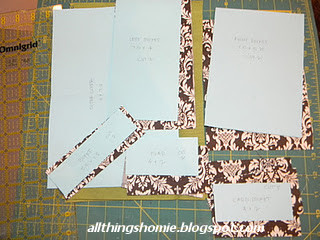
From the green fabric you need to cut 2 pieces (11.5" by 8")
From the brown fabric cut the following:
Left Pocket (8 by 4.5") cut 2
Card Pockets (4.5" by 2.5") cut 4
Kindle Pocket (6" by 2") cut 2
Right Pocket (8" by 5.75") cut 2
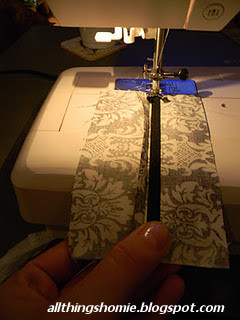
3. Take each of the 4 pockets and sew bias tape along the 4.5" side. Start with the top pocket and sew it on the left pocket along the bottom edge. Continue until you get to the bottom pocket.

4. Take the second left pocket piece and put it right side down. Sew along the right side. Turn over and iron.


5. Sew both Kindle Pocket pieces right sides together. Sew a slightly smaller piece of elastic just under the seam on one side.


6. Take one piece of the right pocket and attach thin silver elastic approximately 2 inches from the top of the right pocket. Pin Kindle pocket to the bottom and put other piece of the right pocket right side down. Sew both sides of the right pocket together along the left side. Turn right side out and iron. Still with me? Here is a picture showing how the Kindle will fit in the pocket.

7. Using one piece of the green material. Pin the left pocket on the left side (surprise!) and the right pocket on the right = ). Also, pin a loop of silver elastic with the ends just hanging over the right side.


8. Place the second piece of green fabric, right side down. Pin and stitch from the bottom around, leaving a 4" gap at the bottom so you can turn it inside out.


9. I trimmed the edges a little bit and then turned it right side out. You can use any pointed edge to push out each corner.

10. Hand stitch the bottom and attach a button and you're done!


I hope that made some sense? Let me know if you need clarification about any of the steps!
That is sooooooo pretty. I love your fabric choices. Great tutorial.
ReplyDelete